Showing posts with label Hair. Show all posts

Thursday, June 30, 2011

Tag: What's in my shower?

 Hey Everyone! 

I was asking for ideas of what to post about, and someone suggested doing a "What's in my Shower" post. I thought it would be a fun, quick and easy post, so here it is! Also, if you have any ideas for future posts, let me know in the comments!

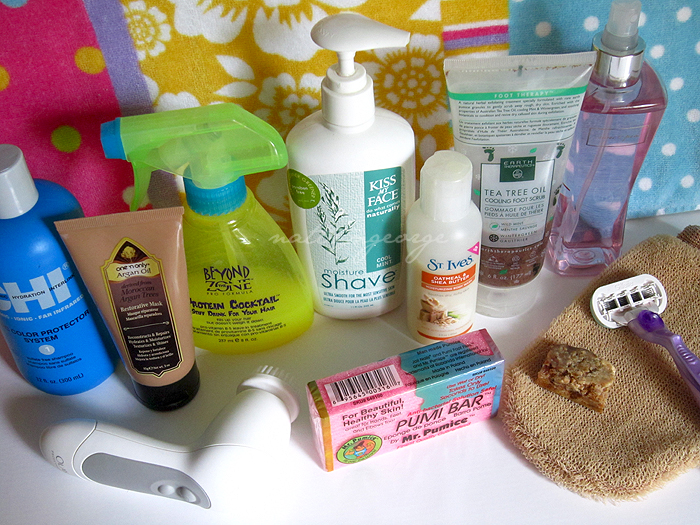
CHI Ionic Color Protect Shampoo - I purchased this for a very discounted price at Marshalls. I always like trying out new Shampoos to find my "perfect one", but I still haven't seemed to come across one that I can't live without. I thought this shampoo was very average - nothing I'd probably re-purchase.
One n' Only Argan Oil Restorative Mask - I've used this mask for the past month, maybe more. I use it after I Shampoo my hair, typically 3 times a week, and I honestly don't really see any difference in my hair. It has so many raves, but it just didn't do anything for me. Another product I won't be re-purchasing. 
Beyond the Zone Protein Cocktail - I usually spray this in my hair after I get out of the shower as an added leave-in. I've had it for a few months now, and I think it's a decent product. I really like the scent, and it doesn't weigh my hair down or leave it looking greasy. I do think with continued use, it made my hair feel a little stronger. When I run out, I'll probably try a different product though, and maybe only re-purchase if I find a great deal on it.
Kiss my Face Moisture Shave - This is my favorite shaving cream to reduce razor burn. It does really work! (See my review here)
St Ives Oatmeal and Shea Butter Body Wash - I really love this body wash - it leaves my skin feeling soft and moisturized. I have pretty dry legs, so this helps keeps them hydrated better than any other shower gel/soap I've used.
Earth Therapeutics Tea Tree Oil Refreshing Foot Scrub - I purchased mine at Marshalls, but they sell the whole line at Ulta. It's a really great gritty exfoliating scrub. It's for the feet, but I actually use it on my body prior to using self tanner, or to get rid of hard to remove self tanner. It's my favorite exfoliate! Even though it's harsh, it doesn't dry out my skin.
Bath & Body Works Sweet Pea Body Spray - I don't really keep this in my shower, but I keep it on an outside shelf. Once I get out of the shower and dry myself, I spritz it all over my body. Yum!
Olay Pro X Cleansing System - I usually use this in the shower once I've cooked up a little steam. I'll use it with whatever cleanser I have on hand, or African Black Soap. (See my review here)
Mr Pumice Pumice Bar - The one pictured is a brand new one I have on hand because I didn't wanna show you guys the actual gross one I have in my shower. Once my feet are a little softened from the hot water. I'll scrub the heck out of my heels with this to rid my feet of any dead skin. Everyone should own a Mr. Pumice!
African Black Soap - I usually take a shower at night while all of my makeup is on, so I'll lather a little soap in my hands and wash my face with it - or use it with my Olay Pro X. (See my review here)
Massage Mitt - For extra exfoliation of my body. I like using these or exfoliation gloves as opposed to wash cloths or loofahs. It helps a lot with rough skin and in-grown hairs.
Venus Breeze Razor - I've always liked men's razors better than women's razors because they give a closer shave - but I ended up purchasing this Venus razor with an awesome P&G coupon I had, and I haven't looked back since!

Are there any products in your shower you think I should try??! I'd love some suggestions of your favorite Shampoos and Leave in Conditioner!

I now tag the following bloggers to do this post! 
(Of course you don't have to.. it's just for fun!)

Monday, June 13, 2011

Review: Clairol Nice & Easy Perfect 10 Permanent Hair Color in Medium Brown!

Clairol Nice & Easy Perfect 10 Permanent Hair Color
(#5 Medium Brown)
The kits contents.
Makeupalley rating of 3.3/5 based on 287 reviews, with a 56% re-purchase rate. (view here)

As you may already know, I dye my hair every month (sometimes I skip a month or two) with Clairol's Natural Instincts Brass Free Brunettes Semi-Permanent Hair Color in Medium Brown. Prior to that, I was using whatever was on sale and from the looks of the box, wouldn't turn my hair orange or black. It was usually a hit or miss - the majority of the time was a miss. I would use Dark Brown dyes, with the anxiety of possibly leaving it in too long or not leaving it in long enough. (I've ended up with jet black hair twice by leaving it in too long.) Other dyes would leave my hair color a brassy brown that would fade to a medium auburn after a couple of months. Medium brown is all I ask for!! Anyway, I loved that Clairol Natural Instincts Brass Free Brunettes didn't cause my hair to go too dark or have any terrible orange tones. Even though the color was spot on, it didn't do a good job covering my white hairs. My hair would be an awesome, rich medium brown and I'd have my platinum white hairs shining though my bangs like nobody's business. So, I thought I'd look elsewhere in the world of drugstore hair dye.

Clairol Perfect 10 sounded like what I needed - 10 minutes to develop, with 100% gray coverage. 

It's your standard box dye - it comes with the application tube that contains the color activator & the color creme, an instruction booklet with plastic gloves and a deep conditioner. It also has a snazzy comb applicator that you can screw on the tube. I like that you don't have to use the comb if you don't want to. You can just toss it and use the squeeze tip like a standard hair dye. I actually like the comb, but for precision root application, I think the traditional way works best - Run the product down your roots and blend with your fingertips or a fine tooth comb.

Since I don't have that many white hairs (yes, they are white. snow white. they aren't gray) just a small family of them in one area, I used the comb applicator and ran the dye through the top of my head and worked it with my fingers down the strands to blend the color in with my hair, then placed my hair in a bun.


I waited 10-12 minutes and washed and conditioned my hair. I then used my NuMe flat iron the following morning to curl my hair.

My hair color didn't change all that much from before, but it does appear a bit warmer. It appears to have a slight mahogany tone in the light. My hair looks shiny and healthy and doesn't feel dried out.

100% gray coverage? No. 96% to be exact, as I still can see about 4-5 hairs that aren't white anymore, but are a light golden. I was a little upset about that, because they are the most visible ones as they are at top of my bangs. Maybe they are what you call "stubborn grays" and need around 20 minutes. Oh well. I do like the outcome anyway, and I probably will purchase this dye again because of the ease of use.

After I dyed my hair using #5 Medium Brown.

**Before tossing the box, rip the top of the box off to remember the brand and shade in case you like the final outcome!

Wednesday, June 8, 2011

First Impressions: NuMe Couture Tourmaline Flat Iron!

NuMe Couture Flat Iron - Black
Product Description: The Couture is a 1 1/3 inch iron with tourmaline-infused plates and variable temperature control which will help tame the unruliest and thickest hair. Simply smooth away unmanageable frizz from those troublesome tresses and add shine to any style – sleek straight, big and bouncy waves or perfect curls. Best for thick or curly hair.

The NuMe Couture Professional Styling Iron is all you will ever need in bringing salon results home. Advanced technology and smart features include a dynamic alignment system that ensures perfect contact between your hair and our 100% tourmaline ceramic plates. The ceramic ion technology generates gentle far infrared heat and by infusing plates with crushed tourmaline crystals, 600% more negative ions help create the perfect frizz free hair without any heat damage for quicker, superior results. It's a proven technology that leaves your locks bouncing with health.


First Impressions: 
  • The iron itself is very lightweight and easy to handle.
  • The iron reaches 410 degrees Fahrenheit, and it heats up quickly.
  • Awesome swivel cord that doesn't tangle up - a big plus. Also, the cord isn't too short, so I don't have to be directly next to the power outlet while doing mine or someone elses hair.
  • Rounded plates, which makes it easy for curling hair. The smooth plastic makes it easy to rotate the iron though my hair to create a curl.
 I only received this iron in the mail yesterday and tested it out on a few strands of my hair today, so I can't any anything else yet on the performance of this iron. I'll be tossing my old iron, and using this iron full time, so I will have a detailed review very soon!

In the mean time, check out Cheryl's review for the NuMe Reverse Curling Wand!
[click the image to be re-directed]

Disclaimer: The product mentioned in this post was provided to me by NuMe for consideration. I am in no way affiliated with the brand mentioned. All opinions are my own.

Thursday, March 3, 2011

Review: Paul Mitchell Express Style Hot Off The Press Thermal Protection Spray

Paul Mitchell Express Style Hot Off The Press Thermal Protector

Product Information: 
-Protects fragile strands from damage caused by heat styling.
-Boosts hair’s strength, fights frizz and provides flexible hold.
-Adds great memory for effortless curls or smoothing with a hot iron. 

-Rice hull extract builds a weightless barrier between hair and heat styling tools.
-Wheat proteins deliver an extra dose of strength.

SELF Magazine Winner of 2010 for the "Best Heat Protectant".

(Source: http://www.paulmitchell.com)

I haven't tried many heat protectors over the years because I had great luck with the first one I ever purchased and I never felt the need to search for another heat protector. The heat protector I use is Fantasia IC Hair Polisher Heat Protector Straightening Spray, which you can find at your local beauty supply (I buy mine from Sally's) or your local drugstore. Really great product - shields your hair as well as makes it feel silky soft and adds great shine. The reason I tried this product was because my friend purchased a bunch of Paul Mitchell products and the salon gave her a travel size of this heat protectant for free. Kindly, she passed it over to me as she had no use for it. Since I just finished my bottle of Fantasia, I decided to give it a try.

My Review: I read the directions a couple times and it said "Spray onto dry hair before using a hot iron. Style as desired. Spray to finish if needed." So, I did just that. I gave my hair a quick spray and straightened my hair as I normally would. After I finished my hair - I didn't notice anything significant. It didn't really add any shine, make my hair silky and it didn't seem to "conceal" my split ends. My hair was though, very manageable with minimal frizz.

I used this product for a week or so, and I tossed it back in my bathroom drawer as it didn't "wow" me. I didn't feel like it was really helping protect my hair from heat damage.

Decided to try it again - this time, instead of doing a quick spray all over my hair, I decided to divide my hair into 4 sections and spray the ends of each section to prevent breakage from the heat. I then, used my hands to work it through my hair better. I noticed the product feels a little sticky - like hair spray. (How is an alcohol based product supposed to shield your hair from heat damage??) I continued on flat ironing my hair. By the end, my hands were left sticky - but my hair was looking very straight and very manageable. I didn't need to finish my hair off with any hairspray - this product gave my hair a lot of hold. Too much hold in fact. I tried brushing my hair and all of my ends were splitting. My hair was very far from being soft and silky.

The next morning, I woke up and my hair looked horrific. All of my ends were going in every which way and several strands were wavy. There was no way to comb through it - I didn't even attempt it because I would of broken off all of my ends. Usually when I flat iron my hair, its the same exact way when I wake up with minor waves underneath.

Overall, I'm disappointed. I'll be sticking with what I know best. This product is most likely only going to be used as a finishing spray. I don't recommend this product for flat ironing - unless you wash your hair every day. I also don't recommend you to use a lot. This may be beneficial for you if you are curling your hair with a curling iron - as if will give you extra hold. This product would probably work better for fine hair - my hair is dry and thick, and this seemed to make it drier & brittle.

What is your favorite heat protector for you hair? Post it in my comments below!
As always, I appreciate all of your comments!
 

Wednesday, January 5, 2011

Everything you need to know about my hair (Unfinished Post)

 (I labeled this an Unfinished Post because I forgot to add a few things. I'll come back & update it later)

I get SO many requests regarding my hair.. such as how I style it, cut it, color it, etc. I don't post much about hair because I'm not a professional, nor am I very experienced - therefore, I'm not very comfortable with the topic of hair. This post isn't meant to be a tutorial - just some answers to very frequently asked questions. :)

Hair Type - My hair type is dry, thick and curly. My hair texture is not coarse, nor is it very thin. My natural curls are a mixture of loose waves and loose locks that start at my roots. I have a lot of natural volume.

I barely ever wear my hair in its natural state.. This is what it looks like air dried with a little hairspray. (This picture is from 2006 - I had jet black hair)
Hair Color - My natural hair color is medium to dark ash brown. In the summer, my natural hair color lightens to a chestnut and it can even lighten up to a very light brown with lots of golden auburn tones. I dye my hair monthly with a semi-permanent hair dye (Clairol Brass Free Brunettes - Med Brown). I don't really like my hair all one color.. so each time I dye my hair, I section off the area of hair that falls above my ears, twist it and clip it back. I then dye all of my hair.. leaving the clipped section alone. What this creates is medium/dark brown hair with a lighter brown (from my hair naturally lightening and from past highlights) peeking through the bottom.
My hair color looks reddish in these photos.. but it's just the lighting. Both photos of my hair were taken the same day. The first photo captures my overall hair color well and the 2nd collage of photos captures the lighter shades underneath my hair well. They are more visible when my hair is straight.

Hair Cut and Length - The total length of my hair is 16 inches and it falls right below my chest when straight, and mid-chest when curly. My hair has lots of layers that start right below my chin. The layers are mostly on the sides of my face. I barely have any layers in the back. My shortest layers (by my face) are 9-10 inches and I have 1" inch layers until it reaches 13 inches. Then, from 13 inches, it jumps to the total length of my hair, which is again 16 inches.

Cutting my hair - I honestly don't feel comfortable explaining how I cut my hair. Because I'm not a professional, I would rather you get advice from an actual professional that will give you the best advice. I rarely ever go to salons because I've never been satisfied with any.. so for that reason I manage on my own. Starting the New Year, I would like to go to a salon more routinely to maintain healthier hair. All I really do is trim my ends when they are looking dead and uneven. Because I heat style often and don't get frequent hair cuts, after time my hair can be uneven. When my ends start looking uneven or damaged, I basically just trim how ever much necessary to even it out. Then I'll pull my hair forward to match up both sides.

My bangs - I have had bangs all my life and never had to attempt to "create" them myself. In high school, I decided to grow them out and sweep them to the side. My bangs start and extend 2 inches from the center of my forehead. I prefer to part my bangs to the right side of my face. After having bangs so long, they naturally fall to the right. They are parted exactly above the arch is of my left eyebrow. From my bangs, they are cut on a downward angle. I have the measurements figured below. The shortest part of my bangs are around 5 to 6 inches. From there, my bangs are around 6 to 6.5 inches, then 7 to 7.5 inches and the longer strands that are there to frame my face are 9 inches (by my chin) to 11 inches (below my chin).

How I cut my bangs - Using a comb, I pull all of my hair forward from 1.5 to 2 inches back. I part my bangs where the arch of my brow is. Using a comb, I comb my bangs slowly down until I reach the area where the shortest part of my bangs will be. Using a scissor, I cut them on a slight vertical angle. To make them more choppy, I make several small snips straight on into the ends of my bangs. Sometimes I take my bangs in one strand and twist them and cut across.. this will make them a little choppy.

Styling my bangs - I like using a 1 inch ceramic flat iron on low-medium heat (my iron goes up to 430, for my bangs I usually put it on 300). I like to use a lower heat setting because it makes my bangs more silky and lightweight. When using a high setting, my bangs may come out too frizzy, fried or too straight. The iron I use has rounded edges.. so it gives more of a blow dried with a round brush look rather than stick straight like a flat iron. I usually separate my bangs in two sections to flat iron. Like I've mentioned previously, from my hairline, my bangs extend about two inches back. So, I create two horizontal sections that are about an inch wide. I clip back the "back" section and start with the "underneath" section. Holding my bangs at 90 degree angle (straight forward) I bring the iron to my roots and slowly drag the iron upward and outward using a rounded motion. I don't clamp my hair too hard or it will curl. I'm using a light hand for this. Then, I do the same with the section I have clipped back. I make sure to start at my roots and bring the iron up over my head in a half circle motion. This creates fluffy bangs with lift at the roots. I don't use any products in my bangs because I want them to look thick and fluffy. Any product in my bangs makes them look oily and weighed down. If my bangs get in the way, my favorite hairspray that doesn't make my bangs look like plastic and that actually holds them in place is Beyond the Zone Flipped out Spray. I highly recommend this hairspray if you're looking for a good one. Check it out next time you go to Sally's! I always keep a small bottle in my purse. In the summer time when I'm driving with the window open, my bangs fly all over the place.. I would pull this spray out of my bag and with a quick spray they would stay in place without flattening them or altering the way I combed them.

Styling my hair - The styling tools I use are basically a 1 inch rounded flat iron, a 1 inch barrel curling iron and a 1.5 inch barrel curling iron. 
Using a 1" Curling Iron - I do this to my hair when I want very polished curls that are look more spiral rather than locks. I start out with clean, dry hair. Then, I apply a heat protector throughout my hair focusing on my ends. Starting underneath my hair, I clip back the rest of my hair. I'm using a high heat setting (400 degrees). Use a setting that's appropriate for your hair. My hair is thick and I need high heat for this. I take 1-1.5 inch strands and without using the curling iron clamp, I take the strand and wrap it around the barrel. I hold it for 10 seconds or so and let the hair go. If I want the curls to be extra defined, with each section I'll spray the strand with hair spray. For a very polished spiral, I will twist the strand and wrap it around the iron, then spray it when released. I continue going up through my hair until I have curled every strand. Then I take both hands and with my fingers apart, I drag my fingers through my hair to loosen up the curls. Then I use a finishing cream (Bedhead After Party) throughout my hair. Again, I fluff my hair with my fingers.. then flip my hair upside down and spray Beyond the Zone flipped out throughout my hair and bring my hair back up and run my fingers through my hair once again. The ending result is very polished curls with loads of volume.

The pink is supposed to illustrate how to wrap the strand of hair around the iron for different types of curls.

Curling with a 1 1/2" Curling Iron - I basically do the same thing as I do with the 1" inch iron.. and it makes very loose waves. For a tighter, larger curl.. I will use this iron like a regular curling iron. I again start underneath (using the clamp) I start at my roots and bringing the iron slightly up and away, I drag the iron down my hair to straighten out my roots. I stop halfway down the strand and I wrap the remaining hair around the barrel and hold for 15 seconds (you may need to hold it longer or it may fall flat). I continue doing this to all of my hair. Then, when I get to the top of my head, starting at the roots I clamp my hair and bring it straight up and outward in the opposite direction (for example, if I'm going a strand on the right side of my head.. I bring the iron outward toward the left side). This creates lift at the roots. Then halfway down the strand I let go and let it cool down. I do this with each strand on the top of my head. Then I go back and take 1 inch strands and wrap it around the barrel and hold it for a bit.. and release. I do this because I like the curls around my face to be slightly more defined than the rest of my hair and I want to make sure to cool down my roots to set the volume I created. Then, I finish my hair off with a finishing cream and hairspray. I am left with loose waves with lots of volume.

Curling with a 1" Flat Iron - Underneath my hair, I start at the roots and clamp the iron down and using both hands I hold on the iron on each side (for more control) and rotate the iron slowly and slightly upward. As I bring the iron down the strand, I am slowly rotating the iron in a circular motion. Don't clamp your hair too hard or you may end up with lots of bumps/impressions from the iron. Holding it too lightly may not curl the strand correctly. Also, the slower down the strand you do, the curlier the strand will come out. The faster you go, the less curly the strand will be. For underneath my hair, till about halfway up.. I like the strand to be more wavy than curly. So I go somewhat quick through this section of my hair. Then the top half of my head, I like the curls to be more defined and I go a little slower with each strand. The strands that fall on the sides of my face, I curl the strand opposite of my face. I came across a video that illustrates the technique I use perfectly. (http://www.youtube.com/watch?v=u-DwlfjbltE - She doesn't start till about 3:00 minutes.. you can fast forward to that part. Prior she is teasing her hair). If you already know how to curl your hair with a flat iron.. this would just be review for you. Like usual, I run my fingers through my hair to loosen up the curls and then I finish off with a finishing cream and hairspray. If I want a softer look, I'll comb through my hair with a paddle brush and then use the finishing cream and spray.

ashleyvictoria (not affiliated) on youtube has great hair tutorials.. if you go to her channel.. type "hair" in her uploads to see all of her hair videos. I also like foxylocksextensions (not affiliated) channel.

Hair Products - The only products I use are Bedhead After Party, Beyond the Zone Flipped out Spray and Fantasia Heat Protector. The current shampoo I use is Kiss my Face Big Body Shampoo, which I love.. It cleans my hair great.. leaving my hair feeling very lightweight and voluminous. I do not use conditioner. For extra shine, I like to use organic, unrefined coconut oil.

I hope this post answered some of your questions and if you have any others, post them in my comments and I'll my best in answering them!
Saturday, December 4, 2010

Dyed my hair & gave myself a trim.. :)

Hey Guys!

Hope everyone is having a good weekend so far.. I've been cuddled up all day in my house because today was the first snow fall of the winter for Chicago.. I love the snow and all, but I do not love driving in it. lol Anyways, Thursday night I decided to dye my hair because it had started to lighten up a bit. I've been using the same hair dye for months now. Clairol Natural Instincts Brass Free Brunettes 5C Medium Brown. The dye is semi-permanent, so the color fades quite fast. I try to limit the fading as much as possible by using color care shampoo's.. but 4-6 weeks seems to be the time limit. I dye it closer to the 6th week mark. The reason I keep using this particular dye over and over is because It always gives me a natural dark, rich brown (it actually looks identical to my actual hair color) with no "brassy" or unnatural tones. When my hair color fades, it fades to a light-medium auburn brown. I don't like auburn tones at all in my hair.. so this dye eliminates it well (temporarily). Also, what I love best of all is that you only need it in your hair for 10 minutes before you shower. After I rinsed my hair thoroughly, I applied some coconut oil throughout my hair and left it in for about 10 minutes to add a little shine to my hair. Then I shampooed (I always do even though it says for the best results wait a day) and let my hair air dry. My color came out extra shiny and the color was exactly as I wanted it. I noticed my ends were looking really uneven as I was flat ironing my hair, so I ended up evening out all of the ends of my layers by an inch or so and trimmed around 2 inches off of the total length of my hair. It definitely is looking a lot healthier. I was thinking of giving myself some wispy in my face bangs. What do you think??
(sorry for my lack of any facial expression lol)

Wednesday, October 6, 2010

FOTD from September.. & bouncy waves!

Since I have a little time right now I'm going to do a small post. :) I took some pictures the first week of September (wow, how fast did September go!??) and was planning on doing a FOTD post and didn't get around to it.


(Indoors with flash)


Face: I prepped my face with a moisturizer. I used Estee Lauder Time Zone Line & Wrinkle Reducing Cream. It leaves my skin feeling very smooth and refreshed and not too greasy. I then dabbed Clarins Instant Smooth Perfecting Touch Primer to areas of my face where I have visible pores (Cheeks, chin & nose). This blurs out the appearance of my pores and makes the area look more matte. I then apply with my fingertips MAC Studio Finish Concealer in the shade NW25 to my under eye area. I then apply Make Up Forever HD Foundation in the shade #127 with my MAC #131 Brush. Then, with a fluffy powder brush I apply a cream bronzer to my cheekbones and buff it into my hairline. I used Chanel Bronze Universel. I then apply MAC Improvise Mineralized Blush to my cheeks with a blush brush. I finish off my face with a setting powder. I apply Make Up Forever HD Powder all over my face with a large powder brush and I apply Ben Nye Banana Visage Powder mixed with Ben Nye Neutral Set Powder to set my under eye makeup.

Eyes: With a smudge brush, I smudge MAC Typographic eyeshadow on my top and bottom lash line. Then, I smudge MAC Cork eyeshadow into Typographic to soften the color. With my MAC #266 Brush I apply Bobbi Brown Black Long Wear Eye Liner to my top lid and in the corners on my bottom lash line to accentuate my eye shape. Then, apply Revlon Colorstay Black Eye Liner to my waterline. I apply Covergirl Volume Exact Black Mascara (which happens to be my new favorite mascara next to Lash Blast) to my top and bottom lashes. I finish off with a pair of Walmart False Eye Lashes. I apply another coat of mascara.
Lips: I outline my lips with MAC Stripdown Lip Liner and apply MAC Shygirl Lipstick. Then, apply a coat of LA Splash Sparkling Coral Lip Gloss.
♥

My hair is very simple to do. I do this just about every day to my hair. I let my hair air dry when I get out of the shower and apply a little thermal protector to the ends of my hair. I then use my Remington Sleek and Curl Tourmaline Ceramic Straightener to flat iron my roots to about halfway down my hair. At about halfway down a strand of hair (about a 1 1/2 inch strand) I firmly start turning the iron under in a twisting motion until I reach the end of the strand. Just as I would with a curling iron.. just with a little more pressure. I do this to all of my hair and finish my hair off with BedHead After Party and then I flip my hair upside down and spray my hair with Beyond the Zone Flipped Out Hairspray and use my fingers to work it in my roots for lift.
Would I recommend this flat iron? Yes. I do recommend it for a cheaper alternative to a more expensive iron. This iron does a great job at creating waves and curls. I mainly recommend it for that. It's not the greatest at straightening my hair because my hair is thick and long.. and I need a larger iron for that.. or different shaped plates. I like that it is very lightweight and has a swivel cord. It also heats up fairly quick. the one thing I don't like about it is, a strand will get caught in between the plates and get pulled out here and there. But, not bad for $35. I purchased it at Target.

Thursday, May 20, 2010

Dyed my Hair with Clairol Natural Instincts Brass Free Brunettes!

Hey Everyone! I thought I was going to get this post out earlier, but I didn't get a chance to. I dyed my hair about one week ago. I was basically just getting tired of my hair color. My natural hair color is a medium/dark brown that pulls towards brassy tones very easily. If ever dye my hair a different shade of brown, it will always fade to the exact same color. A caramel/light to medium brown with auburn-ish tones. Although, it is a pretty color, I'm not sure if its the most flattering color for my skin tone. I think when I'm tanned, a little deeper brown compliments me better. I was a little stumped what dye to purchase.. I decided that I would like to go with a semi-permanent dye (ammonia free) rather than a permanent dye so I will lessen the damage, and just to not completely change my hair color, but darken/deepen it a bit.

I ended up purchasing Clairol Natural Instincts Brass Free Brunettes in 5C Medium Brown. It claims to "counteract unwanted red or orange tones in your blonde or brunette hair color. Use it once a month and Brass Free will give you all the color without the brass." And, it says it will last through 28 shampoos. I thought that it sounds great since I don't want a drastic change. I just want to remove the auburn tone in my hair from past highlights.

What I really like about this is, you only need to put it in your hair for 10 minutes. I first sectioned off my hair. I took about 1/3 of my hair, from around the middle of my ears across I tied it in a tight ponytail and swirled it around into a clip. That section of my hair I did not want to dye. The reason I didn't want to dye it is because I wanted my lighter hair to show through a little bit. I thought it would add a nice little pop of color through the bottom of my hair. I then, very quickly started to apply the mixture to my hair starting at the roots on the top of my head (where my part is) and bringing the mixture down to my ends. I worked very quickly at applying it everywhere. I rubbed very lightly on my scalp (do not massage into your scalp) and I massaged my hair for about a minute to make sure the hair was coated very well. This dye is harder to get off your skin than the regular 40 minute hair colors, so once it hits your skin, be sure to rinse it off right away or you will be scrubbing for a long time. :) I waited about 12 minutes. Yes, I took 2 extra minutes because I wanted to make sure my hair color wasn't going to be too light still. Then, I showered. It says on the box "for the best results, wait 24 hours before shampooing". Considering I took 2 extra minutes, I shampooed. My hair felt pretty dry. Then, I applied the conditioner that was included and my hair was like silk. It was probably the best boxed dye conditioner I ever used. I actually shampooed over the conditioner once more because I don't use conditioner because it takes double time for my hair to dry. My hair felt slightly dry again, so I ended up putting a little more conditioner on my ends only.

viola!


I really like the color. It's very rich and shiny. I do believe I will be using this dye again in about a month. :)

Wednesday, December 30, 2009

Christmas Party Pics! & J Simpson Ken Paves Extensions Review (A much delayed post)

I had an amazing Christmas this year. I spent it with my boyfriends family, and later on with my family. The weekend prior to Christmas, we went to a nice Christmas party at a bar/restaurant, but I felt TERRIBLE. My throat was progressively closing up and it was so sore I couldn't speak or swallow for the rest of the night.. so I missed out on the dinner/dessert and drinks.

This is the gorgeous tree my boyfriends mom decorated


Me and George at the Christmas party


Me and my future mother in law :)


At the the end of the night back home.. (I was originally wearing green, so my nails matched but I had an outfit change.. lol)

And you all know I was wearing my extensions.. and curled my hair with a flat iron.


I attempted to take pictures of my makeup, but I got really shiny and gross by the time I got home.


What I had on:
MAC Select Cover up NW25
YSL Touch Eclat #1
Estee Lauder Double Wear Foundation in Tawny, mixed with Make up Forever HD #128
MAC Blot Powder Medium Dark
NARS Lovejoy & Albatross Blushes
MAC Refined Golden Bronzer

Sephora strass #05 eyeshadow all over lid
MAC Folie eye shadow in crease
MAC Carbon smudged in lashline
Stila Eye Kohl in Amethyst smudged into lashline
Covergirl Lash Blast Mascara
Ardell Lashes (can't remember the #, they are only half strips)

MAC Stripdown Lip Liner
MAC Creme Cup Lipstick
MAC Like Venus Dazzleglass

_______________________

Jessica Simpson HAIRDO (Ken Paves) Hair Extensions
I had some requests asking me if I tried these. And yes, I tried the synthetic hair extensions, as well as the human hair extensions. I purchased them off ebay for a fraction of what they were being sold for at my local ULTA. I think they went to clearance because I don't see them anymore.

Here are my thoughts:
21" Human Hair Extensions in the shade R10 Chestnut
I had these in my hair everyday for a year.

Here are the
PROS:
- The extensions are layered, so it blends in VERY well with your real hair unlike other extensions that hang like strands
- They were thick and gave my hair lots of volume
- After dying them, the condition still stayed great
- Very minimal shedding through shampoos
- They stayed good through lots of heat styling and styling products
- It held a curl well, unlike many I've tried
- You can style it as you would you real hair. For example, I would wash my hair, apply hair gel and diffuse it with the extensions in my hair and it looked exactly like my real hair.

CONS:
- The piece was too large for my head, so it hung onto my neck a little (this may set me back from purchasing it again) Its suppose to be form fitting.. but it wasn't for me.
- It is heavy, so it puts strain on your roots

Here is a picture of me wearing them last year straight:


Here they are curly:


This is how short my hair was without them (picture taken the same week) gahh my hair was so fried!!


Now, the Synethetic 23" Wavy Extensions in R6 Dark Chocolate

PROS:

- Super long
- Very silky when you first buy them
- Layered to blend in with your hair
- Not overly shiny like a lot of synthetic hair, so you couldn't tell it was fake
- The piece fit my head well, unlike the human hair piece
- Light weight
- Curls stayed in place, even when washed

CONS:
- Can't heat style it or put products in it
- Lasts only for a couple weeks or less with daily wear
- Once you wash them the consistency turns coarser
- They don't last longer than 2 weeks. They turn to ratty barbie hair.

I would recommend these if you're going to wear them for a special occasion or event to look your best. Because they only look the best the first few times you wear them.

I don't have many picture of me wearing these. But here is one:

horrible pic.. ignore the pimples. lol

If you have any other questions about these just ask!

Blog Archive